DIY: Transforming Existing Doors
- Saara Karvonen
- Mar 15, 2021
- 5 min read
I have been so excited to write about this transformation. This DIY was very loved on the social media and I got so many questions on how I did it and what I used to do it. This is why I decided to write my first DIY blog post where I explain all the different steps to make these beautiful glazed doors!
Like most of us, during our house renovation, we had to work with a tight budget to make it our own. We had to come up with ideas that wouldn't cost us a huge amount of money but still have the impact we wanted! Anyway, I also much prefer to use anything existing and transform it rather than buying new ones, when possible! Therefore, we decided (in fact, I decided because Matt was a bit afraid of what I was about to do) to transform our existing doors into glazed doors. It was the first time I was doing something like that, but I had a plan, and it turns out exactly like we expected!

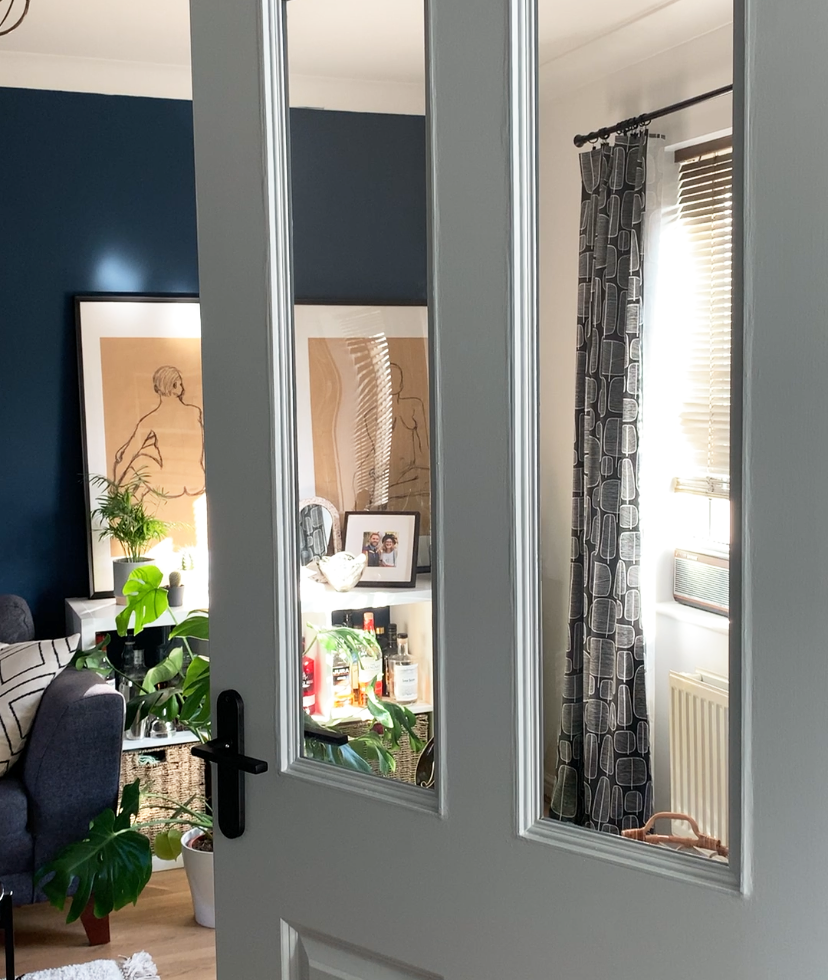
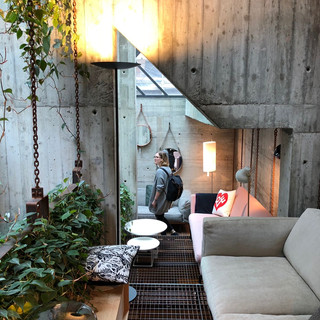
The doors were originally white, and very standard. Nothing wrong with the actual doors, but the reason we decided to transform them was to bring the daylight from the kitchen and the living room into the hallway. Our hallway was amazingly dark, and when the doors were shut, it just felt like a black box. Our biggest hallway discussion was about either removing the doors (to the living room and to the kitchen) or going for glazed doors. We decided to not remove the doors to keep the warmth in each room, especially in winter when it could feel very cold. By creating two glazed doors, it brings so much more light in the hallway, and it feels like the rooms are connected together even with the doors shut. Later on, we will be replacing the front door as well, and probably go for a glazed one to catch the morning sun in the hallway!
In this post, I will be going through each step to create beautiful glazed doors on a budget!
Step 1:
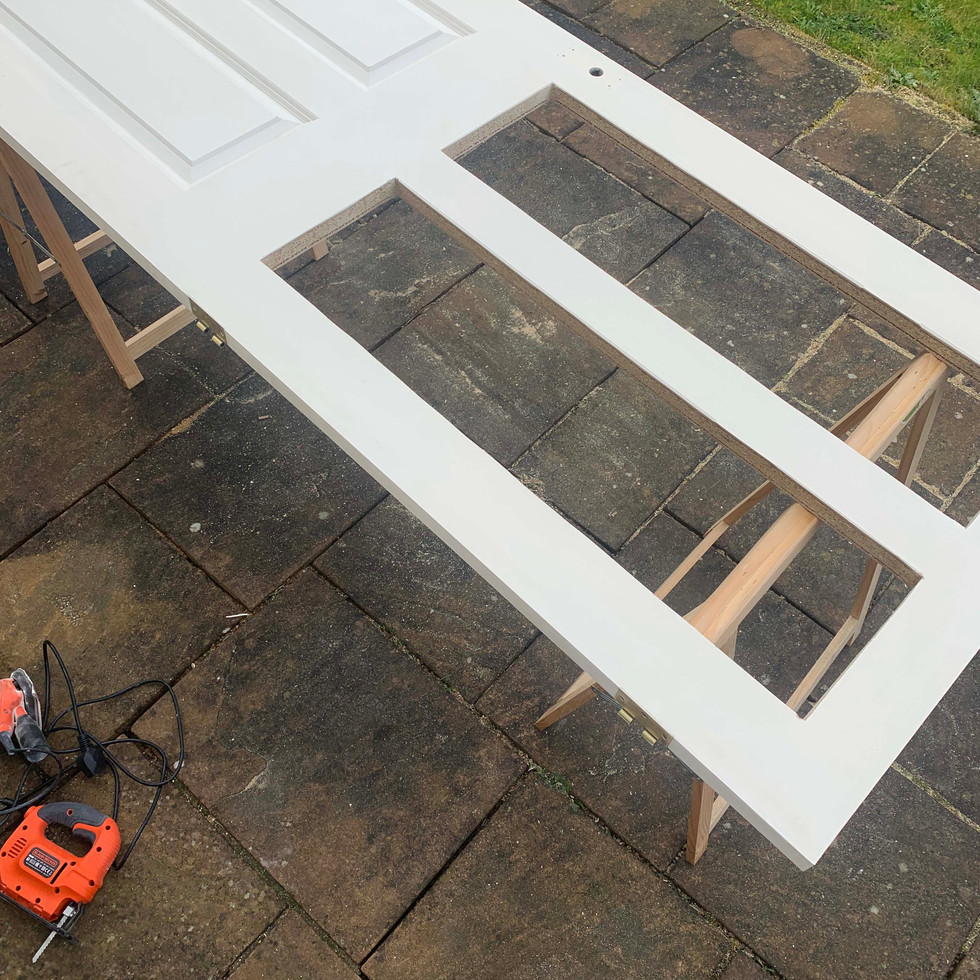
My first step was to decide where I wanted the glass to be. After drawing the line I wanted to cut, I drill a hole in each corner. The hole has to be big enough for the jigsaw blade to go through, as this will help me in the next step. I decided to follow the existing decorative frame. The original door had six decorative frames in total: four big and two small at the top. I decided to connect two big and the top two small ones together to create the new openings for the glass.


Step 2:
I cut two new openings using a jigsaw with an adapted blade, depending on the hardness/softness of the wood. Our doors were made of chipboard. If you're planning to do that too and it's your first time using a jigsaw, I always tend to say that it's better to cut on the inside of the line, rather than on the exact line, or worse on the outside of the line. It's always easier to sand afterwards, rather than having a hole that is too big. I didn't manage to cut a completely straight line, but on the next steps I used a filler to hide the imperfections!


Step 3:
As I said earlier, I didn't cut the new openings very straight. In this step, I created a frame inside the door to make sure I had a clean and straight line (first picture). When making the frame, it is very important that it is perfectly right-angled, as it will be supporting the glass inside. After fixing this frame, I had to use a wood filler to fill in any extra gap. Inside the frame, I also created another frame with pine mouldings (picture 2) which will hold the glass like a sandwich. On this step I am fixing only one side of the frame with No More Nails. It is so secure that I don't even need any additional nails. It is also very important that this frame is right-angled as it will hold the glass!


Step 4:
Next step, sand the doors to prep them for paint. As I was going to paint the doors with a different colour, it was important to take the first glossy layer off the wood to allow the new colour to fix on the surface. I used a wood primer for my first layer, which will also help the final paint to be fixed. When the primer was dry, I painted the door using Bone China Blue from the Little Greene Company. It's important to get the right paint and right finish for a long lasting result. I originally wanted matt doors, but realistically a matt finish is not a good choice because I wouldn't be able to clean the surface, and it would get damaged very quickly. I ended up using the leftover of floor paint we used for our stairs. I absolutely love the colour because it has touches of grey inside, which makes it a very calm blue. The light also reflects nicely on the surface!


Step 5:
Time for the glass to come in. On step 3, I already glued one side of the frame, and on this step I will be fixing the other side that will hold the glass like a sandwich. I unfixed the door to have it flat on the floor, placed the glass in the middle and fixed the other side of the frame using No More Nails. I let it dry for half a day before fixing the door back up. The final touch was to use a flexible caulk between the frame and the glass to avoid the glass to move/break/make noise when closing the door.


Et voilà!


I have probably never been more stressed about a DIY than this one, because it was the first time I was doing it, and I didn't want to ruin our doors! The final cost was about £60 per door - the pine mouldings came to £19 from Homebase, the frame inside was £9.50 from Homebase too, the glass was £21.50 which was cut to size by a local glass company, and the handles were a bargain for just £9.99 from Screwfix. This breakdown doesn't include the caulk and No More Nails, as it's something I already had at home, but it would only add an additional cost of a couple of pounds. It doesn't include the paint either because it was the leftover paint from the stair transformation (a full tin cost £72 for floor paint).
At the end, it was a very long process and a lot of doing it again until it's perfect! But does it need to be perfect when it's hand made?